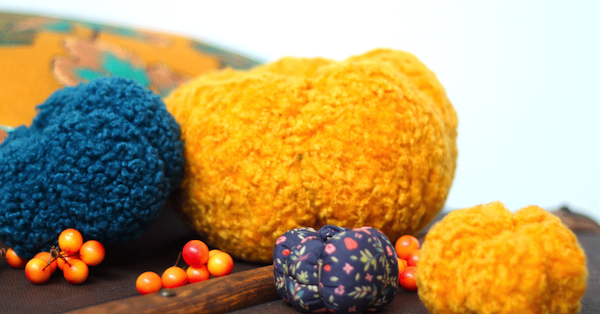
DIY the fabric pumpkin
Halloween is coming! Here's how to sew your pumpkins to decorate your table, living room, or even your outdoors.

Material :

- Choice of fabrics
Vary the sizes, materials and colors to have a nice collection :-)
Step 1: Cut the shapes
We are going to make 3 pumpkins of different sizes. Cut out 3 fabric cloths with the following dimensions :
12x24 cm
16x31cm
27x52cm
Fold each piece of fabric in two, right sides together, matching the short edges.

Sew the short side.

Step 2: Shape the pumpkin
Sew a running stitch at 0.5cm on one of the two raw edges with extra strong thread.

Tighten your stitches by pulling on the thread and knot it several times to hold everything together.

Turn the pumpkin over right side up and stuff with filling.


Repeat the gathering stitch on the other raw edge of the fabric. Tighten and tie the thread.


Still with extra strong thread on a long doll needle, tie a knot in the center of the pumpkin then sew through the center of the pumpkin while crushing it a little. Pierce the pumpkin from top to bottom.


Secure the seam with a knot.

Repeat the step 5 times.


Then adjust the folds to form the pumpkin. You can move the threads a little from side to side once the 5 threads have been sewn and each seam has been secured with a knot.

Your pumpkin is ready !

You can now make the others ;-)
See you soon,
Mika

