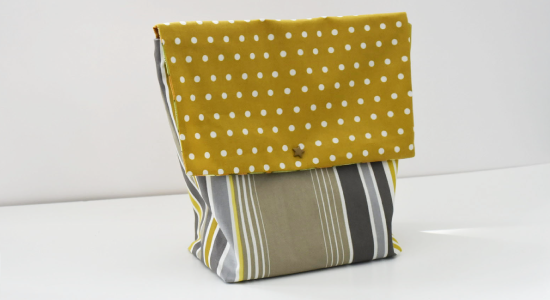
DIY the lunch bag
Driiiing ... It's back to school! For this event, our blogger Léa invites you to make this practical and cute Lunch Bag. Choose to put your snacks, meals, make-up, secret objects ... Long story short you can always use this case!

Material
To make your lunch bag, you will need :
- 30cm coated cotton fabric
A large collection of waterproof and anti-stain fabrics can be found on the eShop.
- 30cm 100%cotton fabric
It will be used for the lining of the kit. Choose an OEKO-TEX® certified cotton free of harmful substances. You can find them here >
- 40cm strap
In order to match everything, let's go to the haberdashery departement >
- Sewing thread
- Snap buttons
- Sewing diagram
Step 1 : Cut out the pieces
Print the instructions (French) on a A4 paper so that you have the cutting and sewing instructions next to you. It will be useful throughout making the Lunch Bag.

Transfer the measurements from the drawings * 1,2,3 onto pattern paper then onto the coated fabric or cotton as specified and cut your pieces.
Step 2 : Sew the strap
Place the strap in the center of one of the coated fabric pieces * 1 (on the right side of the fabric). Pin and sew according to the dotted lines shown in the sewing diagram * A, this will be the back side of the Lunch Bag.

Step 3 : Assemble the exterior sides
We will now assemble the front and back sides of our Lunch Bag :
Pin the two sides * 1 of the coated fabric right sides together and stitch the sides and bottom. To sew the two corners, separate the fabrics from the corner, flatten and stitch.


Repeat the step to assemble the lining of the bag with the cotton pieces.

Do not forget to leave 5cm opening to turn the piece over. Do not close the opening!

Step 4 : Placing the flap
Start by assembling the flaps right sides together, pin and sew a seam on the sides and the top of the flap.
Pin the flap on the back side of the strap as shown in the sewing diagram * D.

Step 5 : Assemble the bag and the lining
It's time to assemble the "lining bag" and the "coated bag".
Start by tucking the coated bag into the lining.

Make a hem by folding the edges over 0.5cm and hold everything with pins or small patchwork clips. Then sew a seam around the edge with the sewing machine.
Turn the piece over through the opening left in the lining and close with a blind stitch.


Add a snap button and your lunch bag is done ... All you have to do is fill it with what you want !

See you soon,
Léa

